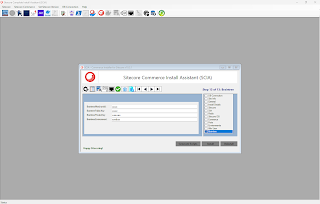
Sitecore Commerce 10.3.0 over Sitecore 10.3.1 + SXA 10.3.0 : Step-by-Step installation using Sitecore Complete Install Assistant (SCIA)
OS: Windows 11 Pro
Specs:
Install SQL Server: I installed SQL Server 2017 Enterprise Edition.
1. Copy over the SCIAWinApp.exe to c:\SCIA folder (or a folder of your choice).
2. Copy the license.xml file to the same location as the exe
3. Right Click the exe and run as Administrator. The following window will open:
- Provide the sa password
- Click the Connect button
4. The login page disappears and now you are connected to SQL Server:
5. Next click Setup Versions and Prerequisites DB table in the menu:
6. In the following window, click Create button:
You should see a status as "DB Tables Setup Successfully":
7. Close the above window and click "Set Version" button in menu-bar and you should be able to see the available Sitecore versions in the drop down including the latest - 10.3.1:
8. Select 10.3.1 and press save button:
Since this is a brand-new machine, SIF modules are not installed and that is auto-detected by the application. So, click the SIF module install button in menu-bar:
You should a tool tip on all buttons in the application!
9. PowerShell window opens, follow the prompts by typing "Y" / "A" for installation to complete:
Close the PS window.
10. Now, in the Set Sitecore Version window (step 8) select the version as 10.3.1 and press the save button to see the window disappear this time.
11. Now, to install Commerce, the following are pre-requisites:
- Sitecore 10.3.1 + SXA 10.3.0
12. You can use SIA or SIF for Sitecore 10.3.1 installation, let us invoke SIA from the menu-bar:
To invoke SIF-based installation, click this button in menu-bar:
13. Continuing with the installation using Sitecore Install Assistant, since this is a brand-new machine, there are no 10.3.1 setup files. So, click the "Download and Setup All Pre-requisites" link:
This goes and pulls down the 10.3.1 setup files from SDN:
14. Then, smartly launches the installer, click start:
Now, the process is same as covered in this blog post by Ilma Fatima (from step 4 in that post).
15. In case if you have to restart machine as part of prerequisite installation,
- Remember to open the SCIA exe as administrator (step 3)
- Provide SQL password and press Connect button
- Set Sitecore Version as 10.3.1 and save (step 7)
- Click Sitecore Install Assistant button from menu bar (step 12) and continue installation by clicking Start button
Remember to Click SXA in the end as part of Sitecore installation:
Sitecore 10.3.1 with SXA installed:
Commerce Installation:
16. Click the Sitecore Commerce Install Assistant button in menu bar and the following window will open:
17. Click the DB Connection Check button:
18. Since it is the first time you are accessing Commerce installer, some of the things like site prefix / suffix are all configurable and if set once is automatically picked across installations:
Also, in this case, it automatically aligns to Sitecore Install Assistant prefix and suffix site setup:
For a future installation, in case if you want to change the prefix or suffix, change it here and ensure it aligns with the Sitecore SXA instance.
For now, click the save button in the above Settings window and you would be asked to provide Braintree details, provide some random values for now and click save button.
You can change the settings at any point since it is available as a menu option in the commerce installer window.
19. Close and reopen the commerce installer window,
- Click DB Connection Check button since that will be the only enabled button:
20. Now, before entering the site prefix, let us setup the prerequisites, so click the "Show Prerequisites" button and a window opens up with all necessary prerequisites for Commerce installation:
21. Now,
- First, click Download Prerequisites, goes and pulls down the prerequisites from various sources - wait for this PS script to finish its job
Close the PS window since the prompt has returned.
- Next, Click Setup Prerequisites: unzips and installs the necessary prerequisites:
a. Redis: Follow prompts to install it
b. If .net hosting is already present, just close the concerned installation window:
22. Now, re-click the prerequisites window to check if all is fine:
Should be mostly green now:
23. Since ASP.NET core runtime is displayed red, I'm going to check the same by clicking the ASP.NET Core Runtime 3.1.8 option in the bottom of the window:
24. Clicking the link in the above window, opens the runtime automatically for installation:
25. Once the installation is complete, re-launching the prerequisites window must show all in green:
26. Now, we must be all set for Commerce installation, once you match the site prefix with what is in IIS, the concatenated value will be the IIS site name:
27. You can now traverse through the tabs using the next/previous button(s) and check the details of installation:
28. In the tabs, values will be automatically populated from the original Sitecore instance or the settings we already saved:
Solr tab filled automatically based on original Sitecore instance:
Braintree details picked from settings:
29. You should be able to click the Validate All button once you traverse through all the tabs:
31. While installation is in progress, in the file system, you can check the PS files generated by the application:
Storefront after 30 minutes of runtime,
https://github.com/navancommits/SitecoreCompleteInstallAssistant/releases/tag/10.3.1x64
For more details check earlier blog posts like this one


Comments
Post a Comment