Sitecore 10.3.2 instance installation using the Sitecore Install Assistant
Sitecore 10.3.2 was released yesterday. In this blog post, i setup a Sitecore 10.3.2 instance locally. Note that there is also an installation guide provided by Sitecore here but this blog post is a cut-down version and also shows the actual instance getting installed. Here is the release notes for reference.
Prerequisites:
a. Download the installer from the Sitecore downloads site . Unzip the files to an accessible file location.
b. Sitecore license file is available in the file system
c. SQL Server is installed along with SQL Server Management Studio


My Machine configuration:
Installation process:

3. Microsoft .NET 6.0.22 gets installed as part of prerequisites: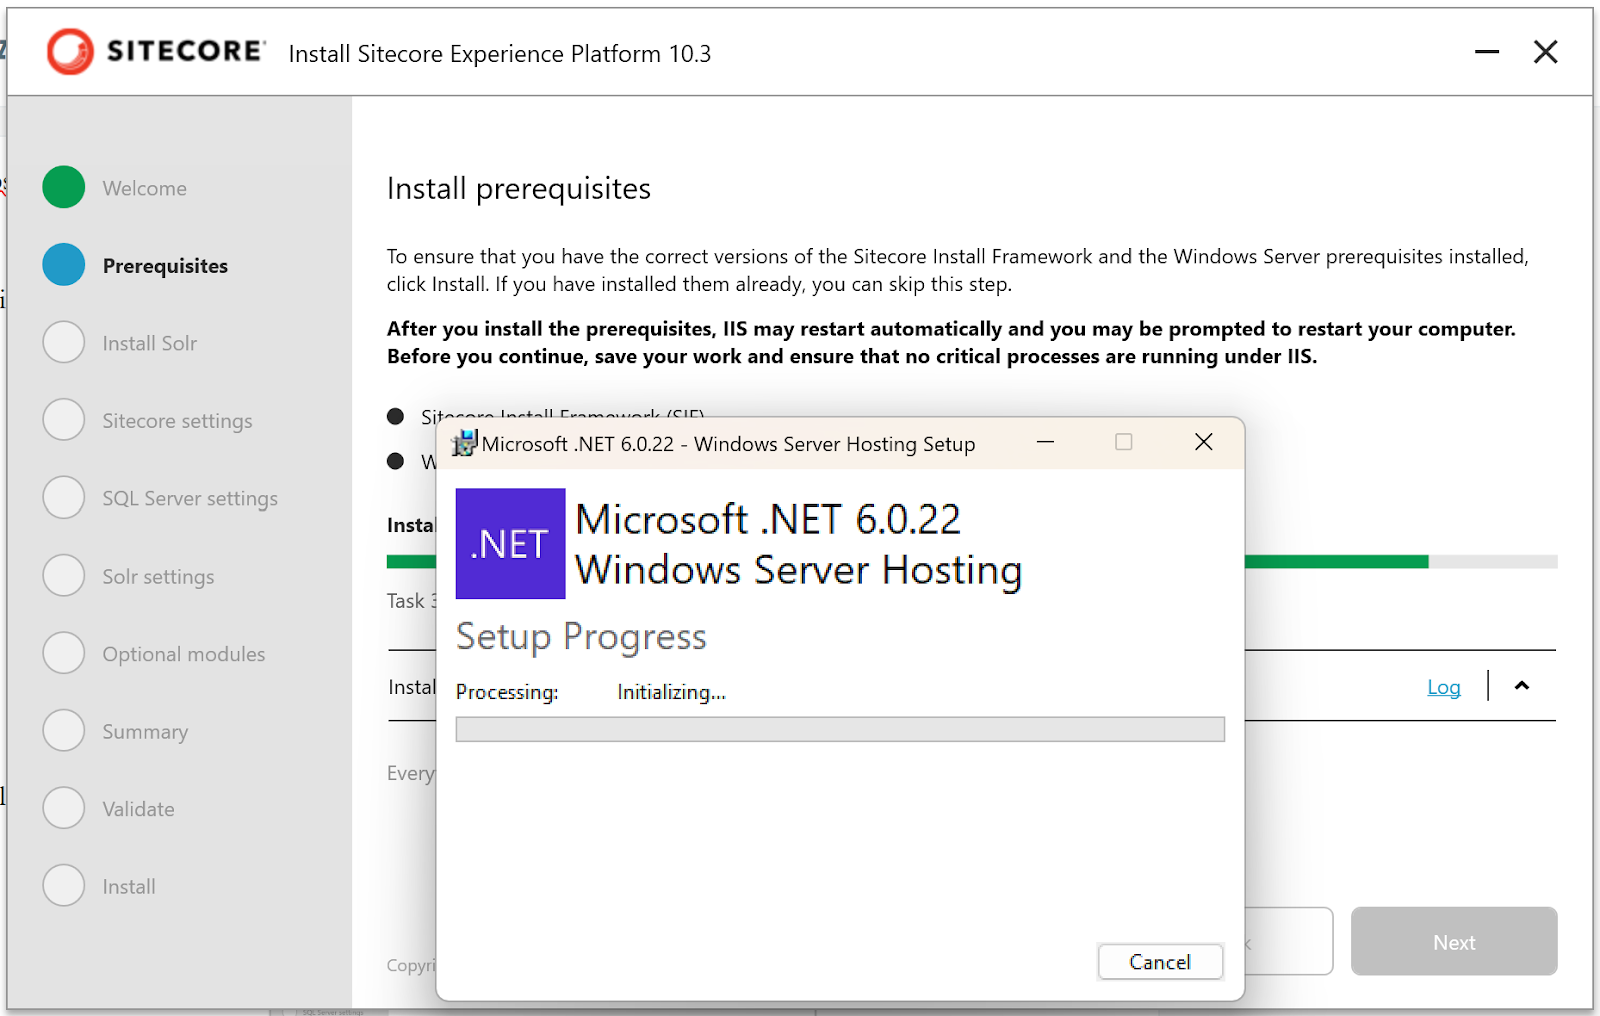
4. Once the prerequisites are installed, restart the computer as stated:
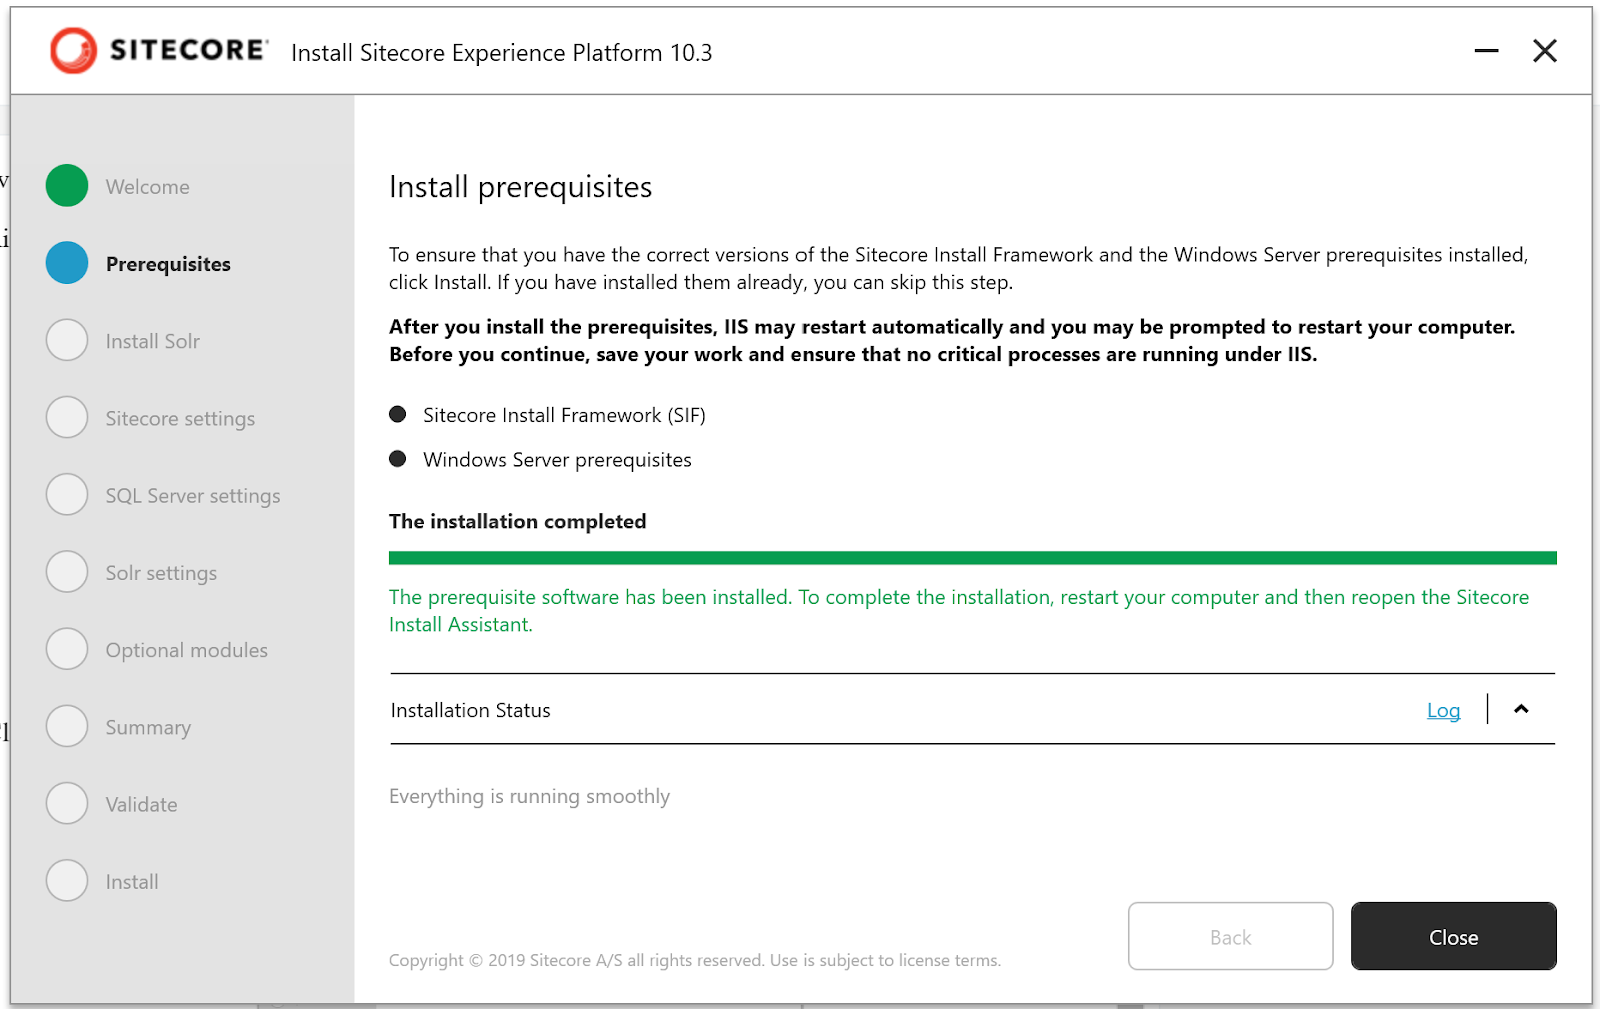
5. Once the restart is complete, re-open the setup.exe (as administrator) and this time skip the Install prerequisites section:

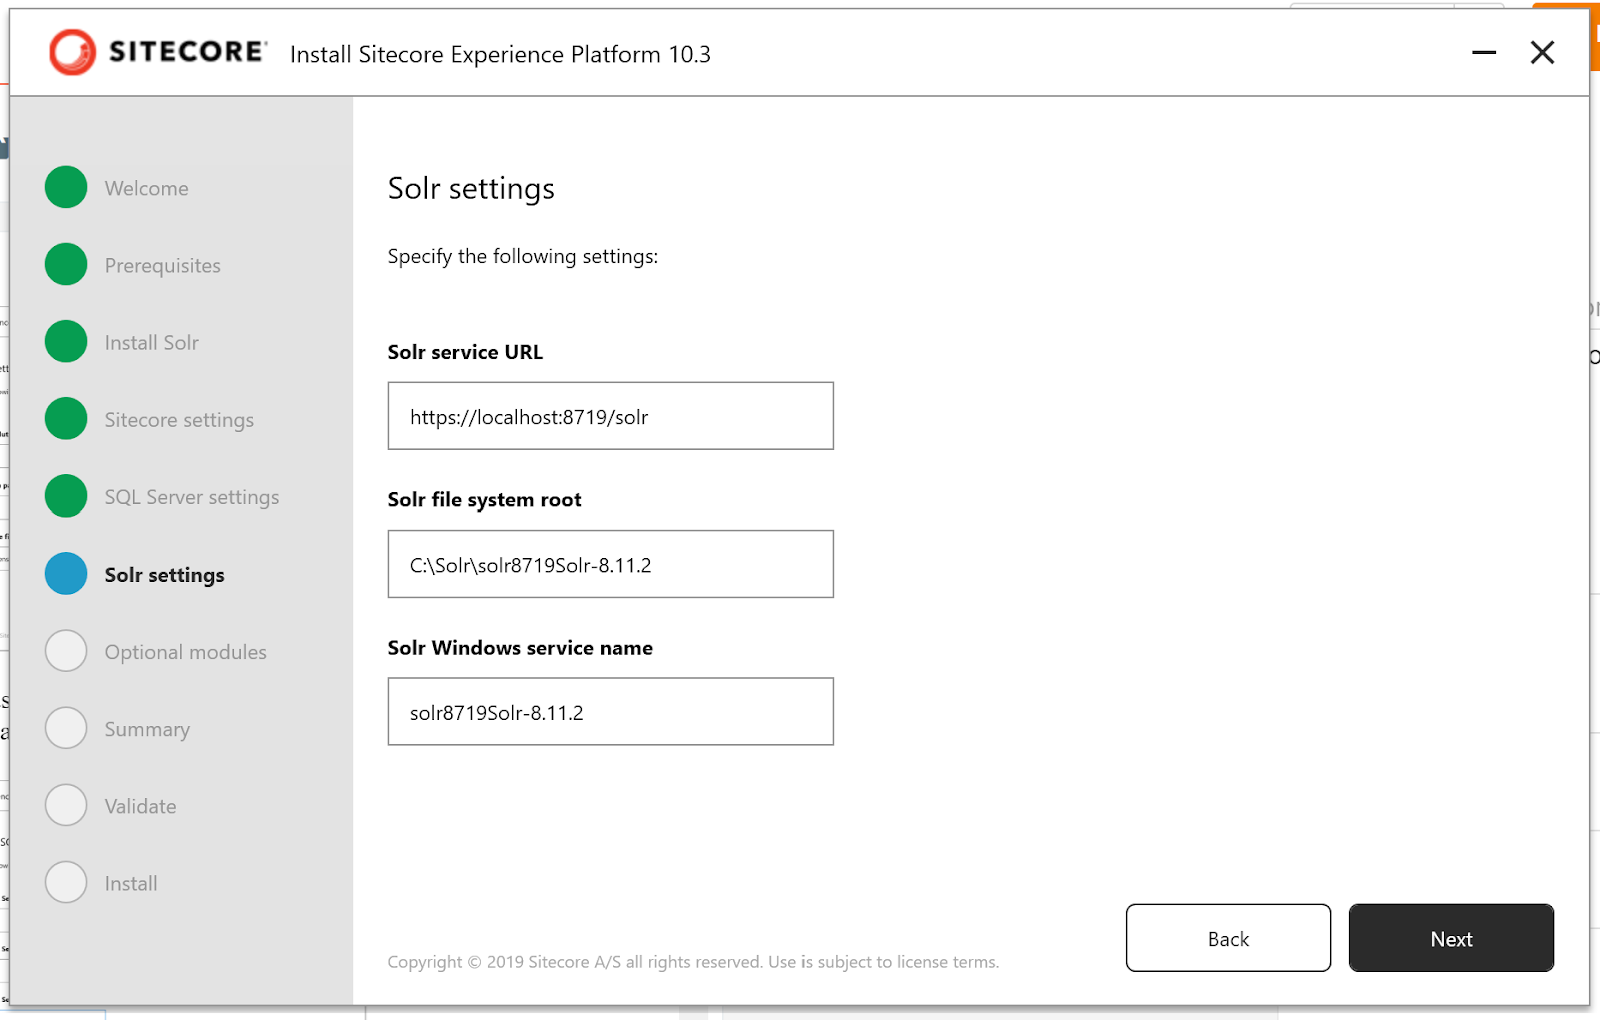
6. Now, is the time to install Solr so, specify a port in case if default port 8983 is busy. In my case, the port is busy so, i picked a unique port number and click the install button:

7. Solr-related files get downloaded and installed, the entries are made in solr log:

8. Next, provide the Sitecore instance prefix along with admin password, point to the Sitecore license.xml file in the file system:

9. Once you click the next button, you are asked for the SQL Server instance details so, provide the user name and password for the SQL Server instance:

11. Click the next button and you can select SXA module if you want to install the same:

12. Once you click the install button, you are presented with the summary screen:

13. On clicking the next button, validation of information happens and in case if your sql server instance is not running, you might get a message as follows:

14. In my case, the SQL Server and SQL Server agent services were set to manual start so, once i started the services, i clicked the back button in the Sitecore installer and then clicked the next button to see successful validation:

15. When you click install button now, the installer will start setting up the Sitecore instance in your machine:

16. You can click and check on the latest log details in the file system as it gets updated:

Note that there are three types of log files populated based on context:

Installation process:
1. Right click on the setup.exe and run as administrator:
3. Microsoft .NET 6.0.22 gets installed as part of prerequisites:
4. Once the prerequisites are installed, restart the computer as stated:
5. Once the restart is complete, re-open the setup.exe (as administrator) and this time skip the Install prerequisites section:
6. Now, is the time to install Solr so, specify a port in case if default port 8983 is busy. In my case, the port is busy so, i picked a unique port number and click the install button:
7. Solr-related files get downloaded and installed, the entries are made in solr log:
8. Next, provide the Sitecore instance prefix along with admin password, point to the Sitecore license.xml file in the file system:
9. Once you click the next button, you are asked for the SQL Server instance details so, provide the user name and password for the SQL Server instance:
10. On clicking the next button, you are provided with details of the installed solr instance:
11. Click the next button and you can select SXA module if you want to install the same:
12. Once you click the install button, you are presented with the summary screen:
14. In my case, the SQL Server and SQL Server agent services were set to manual start so, once i started the services, i clicked the back button in the Sitecore installer and then clicked the next button to see successful validation:
15. When you click install button now, the installer will start setting up the Sitecore instance in your machine:
16. You can click and check on the latest log details in the file system as it gets updated:
- Sitecore-InstallConfiguration_1724194116.txt
- PrerequisitesInstallationLog_1724194116.txt
- SolrInstallationLog_1724194116.txt
17. Note that the whole installation process, from downloading the files and having a running local instance took me about 45 minutes in my 32 GB RAM machine with decent internet bandwidth as provided in the top of this post.


Comments
Post a Comment