Sitecore 10.4 XM on-premise instance to XM Cloud Content migration tool test-drive
As I had setup a local Sitecore 10.4.0 instance, I wanted to try the Content migration tool available for quite sometime (probably from 10.1). This is a simplistic tool that uses Sitecore Content Serialization, released as part of 10.0 version, as the core concept. Note that the tool must run in the machine that hosts the on-premise Sitecore instance. Probably, this is also the reason that the tool doesn't support a source hosted in Azure PaaS or any other PaaS as of now.
Content Migration tool process overview:

My goal was to setup a few content folders/items in my local instance and push it to the XM Cloud environment. So, without much ado - Two options available in the content migration tool.

1. GUI-based option: Unzip the downloaded zip file and launch the XMMigrationGUI.exe
Welcome screen:
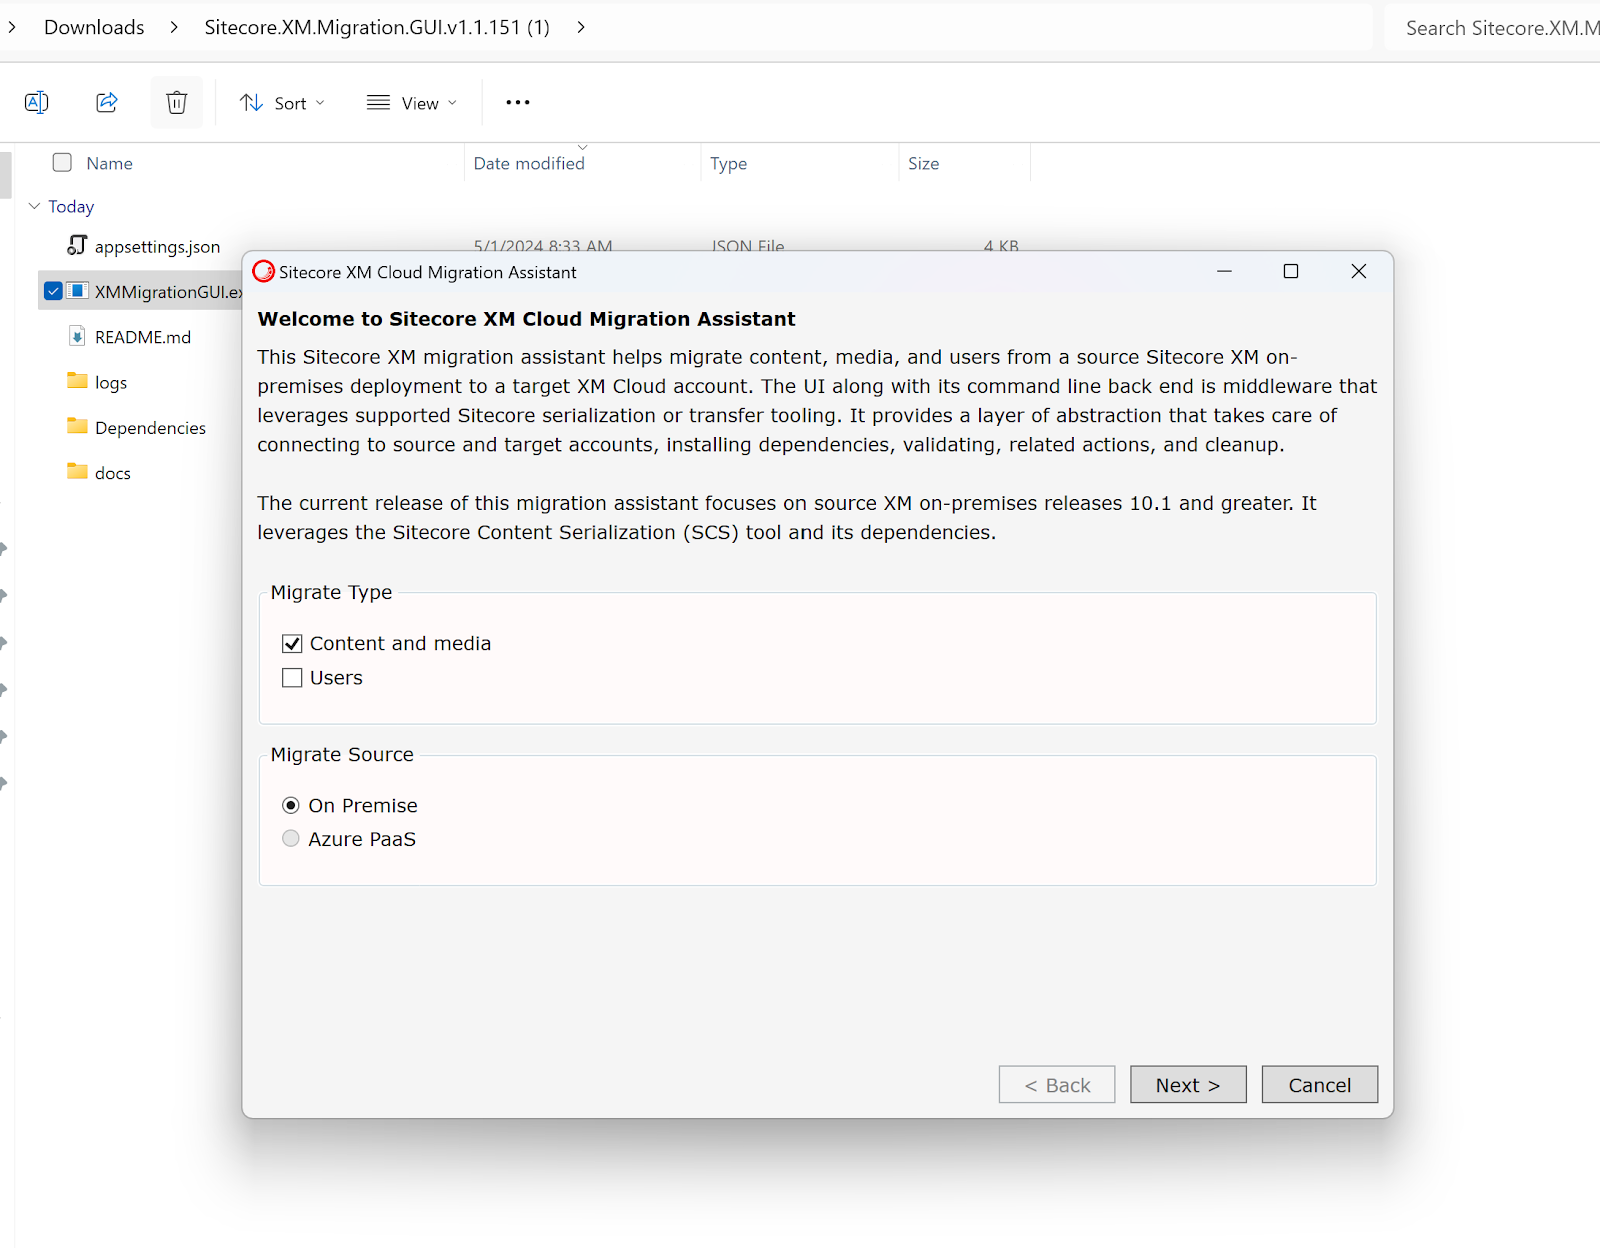
The tip beneath the fields are self-explanatory and source points to my local instance:

Destination XM Cloud instance:

Content tree from source is loaded:

Note that the GUI could become unresponsive if you try to load a tree node with 1000s of items since the loading happens synchronously.
Once you click the next button, you should see the changes reflected in the associated appSettings.json:


High-level overview of the migration:
==========================================================================
Step 1: Get Migration Dependencies for Sitecore CM Instance
Download Sitecore Management Services module (SMS)
==========================================================================
Step 2: Install Migration Dependencies (SMS) On Sitecore CM Instance
==========================================================================
Step 3: Setup Sitecore CLI
==========================================================================
Step 3.1: Setup non-interactive client login for CLI (source instance)
==========================================================================
Step 4: Migrate from XM Legacy using Sitecore Content Serialization (SCS)
Pull from Source
==========================================================================
Step 5: Migrate to XM Cloud using Sitecore Content Serialization (SCS)
Push to XMC Destination
==========================================================================
There are folders created in the file system for each step for reference under the temp folder:

For instance, serialized items before push to XMC destination for reference in the step-5 folder:

The following diagram is based on folder artifacts:

I then bulk loaded items in source instance with this SPE script:
##########
##########
Bulk load time to XMC:
|
Item Count |
Seconds |
|
10 |
1.5 |
|
1000 |
149 |
|
10000 |
1669 |
2. CLI-based option: If you download the cli zip, then you have an XMMigration.exe and with the command line, you can check the available options:
.\xmmigration.exe --help

The migrate-content cmdlet does the same job as the migrate button click in the GUI and all that it needs is the appSettings.json (same structure as the one with the GUI tool) with tree nodes for serialization.
Usage:
.\xmmigration.exe --migrate-content
The migration section has the (source and destination) environment details as follows:


Comments
Post a Comment