Although there are so many posts about Sitecore JSS, here is one more since JSS version>=20.0.0, there are changes in the way the JSS CLI create command works. Also, I initially started with the user-input based approach and made wrong choices in the command line to realise some choices are not compatible. Based on the user-input based approach, it is easy to derive a one-shot command to setup the JSS project. Most of the content here is derived from latest Sitecore documentation but I've followed a step-by-step approach and documented my thoughts + depicted the process in diagrams wherever possible.
******************************************************************
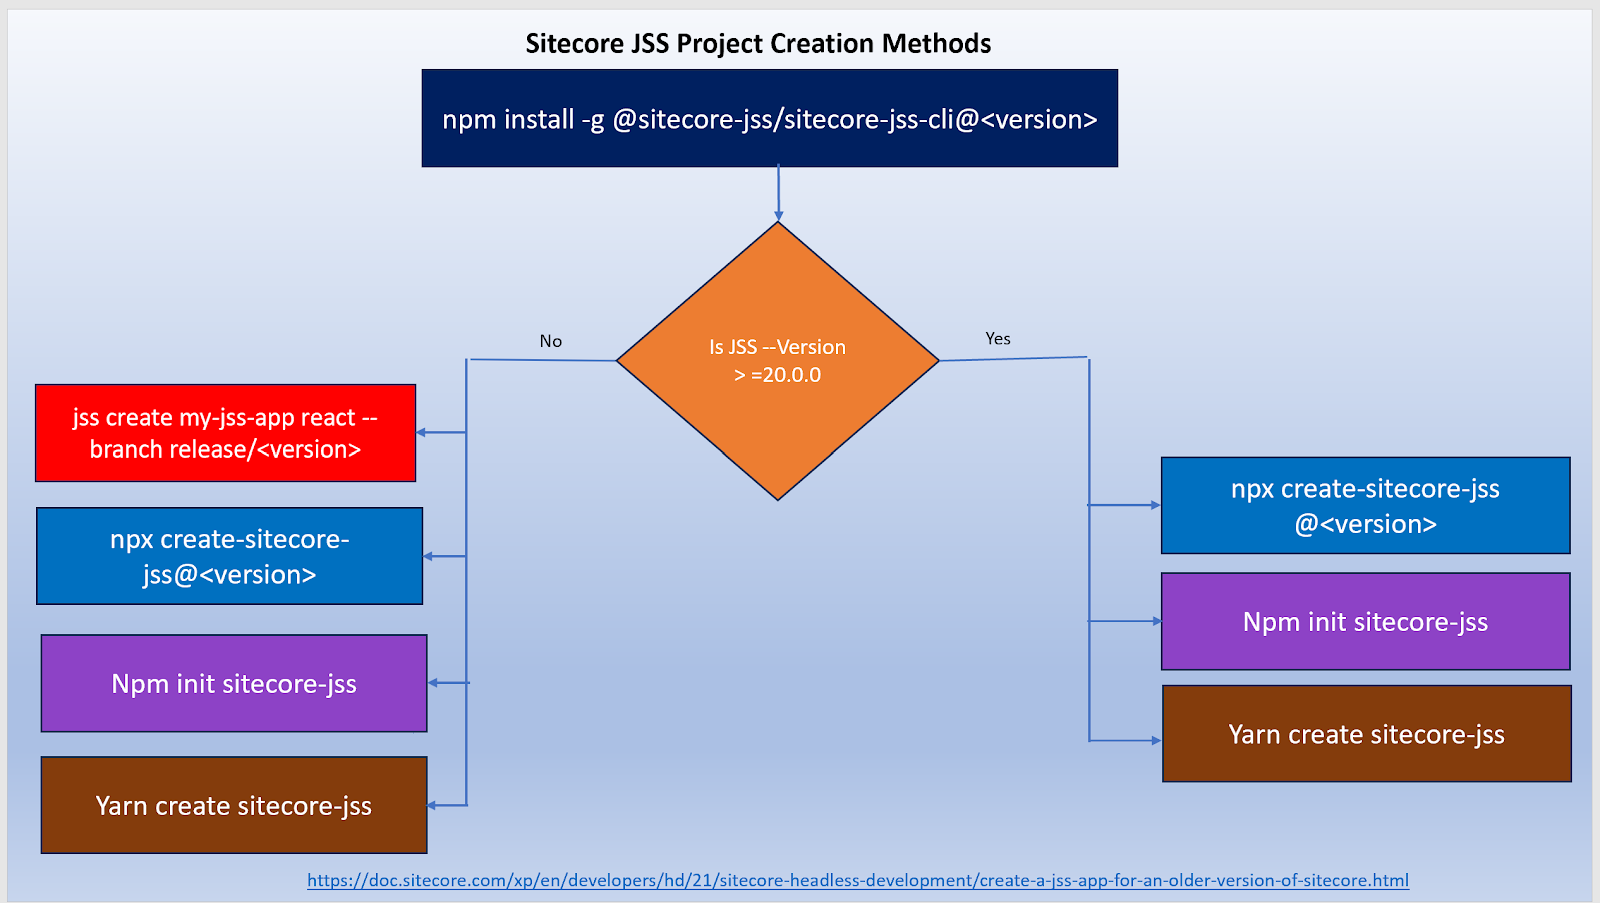
Different JSS project creation methods:
Points to note in case of the above diagram:
- jss create will work only for JSS project versions less than 20.0.0
- npx will work only for JSS project versions greater than/equal to JSS 20.0.0
- If you don't specify a version, JSS project is created in latest version although your global version might be different
******************************************************************
First things first, the Sitecore JSS disconnected mode setup process at a high-level looks like this:
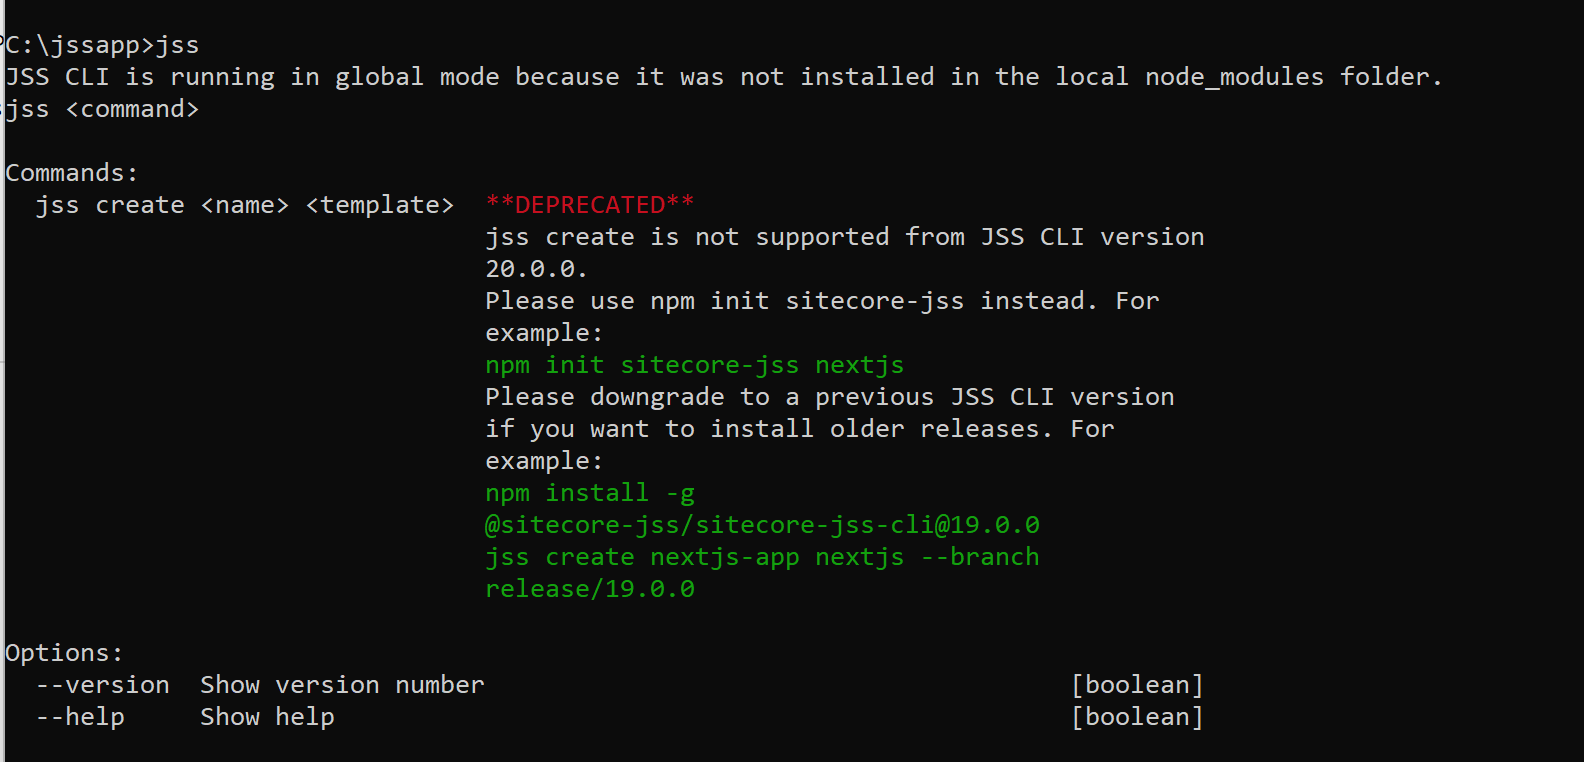
Note that starting from Sitecore JSS 20.0.0, jss create is deprecated.

I'm so happy that jss create is deprecated. There could be many reasons but for me, it does not have nextjs as part of the template options and you instead have to specify react!
************************************************************
The disconnected mode in this blog post is user-input-based, on the other hand, if you are a command-line fanatic, you can
check this documentation and derive the following commands to install the disconnected jss project with add-ons all in one shot:
npx:
npx create-sitecore-jss --templates nextjs,nextjs-styleguide --appName my-jss --fetchWith REST --language da-DK --destination my-jss --prePushHook false --hostName my-jss.dev.local --prerender SSG
npm:
npm init sitecore-jss --templates nextjs,nextjs-styleguide --appName my-jss --fetchWith REST --language da-DK --destination my-jss --prePushHook false --hostName my-jss.dev.local --prerender SSG
yarn:
yarn create sitecore-jss --templates nextjs,nextjs-styleguide --appName my-jss --fetchWith REST --language da-DK --destination my-jss --prePushHook false --hostName my-jss.dev.local --prerender SSG
************************************************************
Let's rewind and start from scratch to understand the above commands,
Setup/Prerequisites:
JSS Version: 21.4.0
npm version: 9.8.1
Node version: v18.18.1
Install JSS CLI globally as follows:
If you want to install a specific version of JSS CLI globally, suffix with version as follows:
npm install -g @sitecore-jss/sitecore-jss-cli@19.0.0
For latest version: npm install -g @sitecore-jss/sitecore-jss-cli
Note that the above command doesn't have a version specified so, latest version of JSS CLI will be installed and that is 21.4.0 as of this writing:
. jss --help now displays all available commands:
******************************************************************
User-input based approach:
1. Disconnected mode:
According to the Sitecore documentation, there are 3 ways to create the JSS project:
1. npx: npx create-sitecore-jss@<versionnumber>
2. npm init: npm init sitecore-jss launches the same prompt as npx create-sitecore-jss
3. yarn: yarn create sitecore-jss launches the same prompt as npx create-sitecore-jss
All the above three commands will launch the template selection option as follows (yarn command in action here):

So, let's cover the scenarios related to npx alone from here since all aspects are applicable to other commands too.
1.1 npx approach (using GraphQL to fetch data):
1.1.a Execute npx create-sitecore-jss
I think one of the useful features of this command is the ability to specify a version number. For instance, if you have globally installed v21.0.4, with this command, you can install v13.0.0 by specifying it as part of the command: npx create-sitecore-jss@13.0.0
1.1.b Select nexjs option and press enter key for all other further prompts, until you reach the GraphQL vs REST selection
1.1.c Select GraphQL for data fetch and again press enter key for all further prompts until you reach this one:
1.1.d Press space bar to just select the first option and press enter key for next prompt to start npm installation:
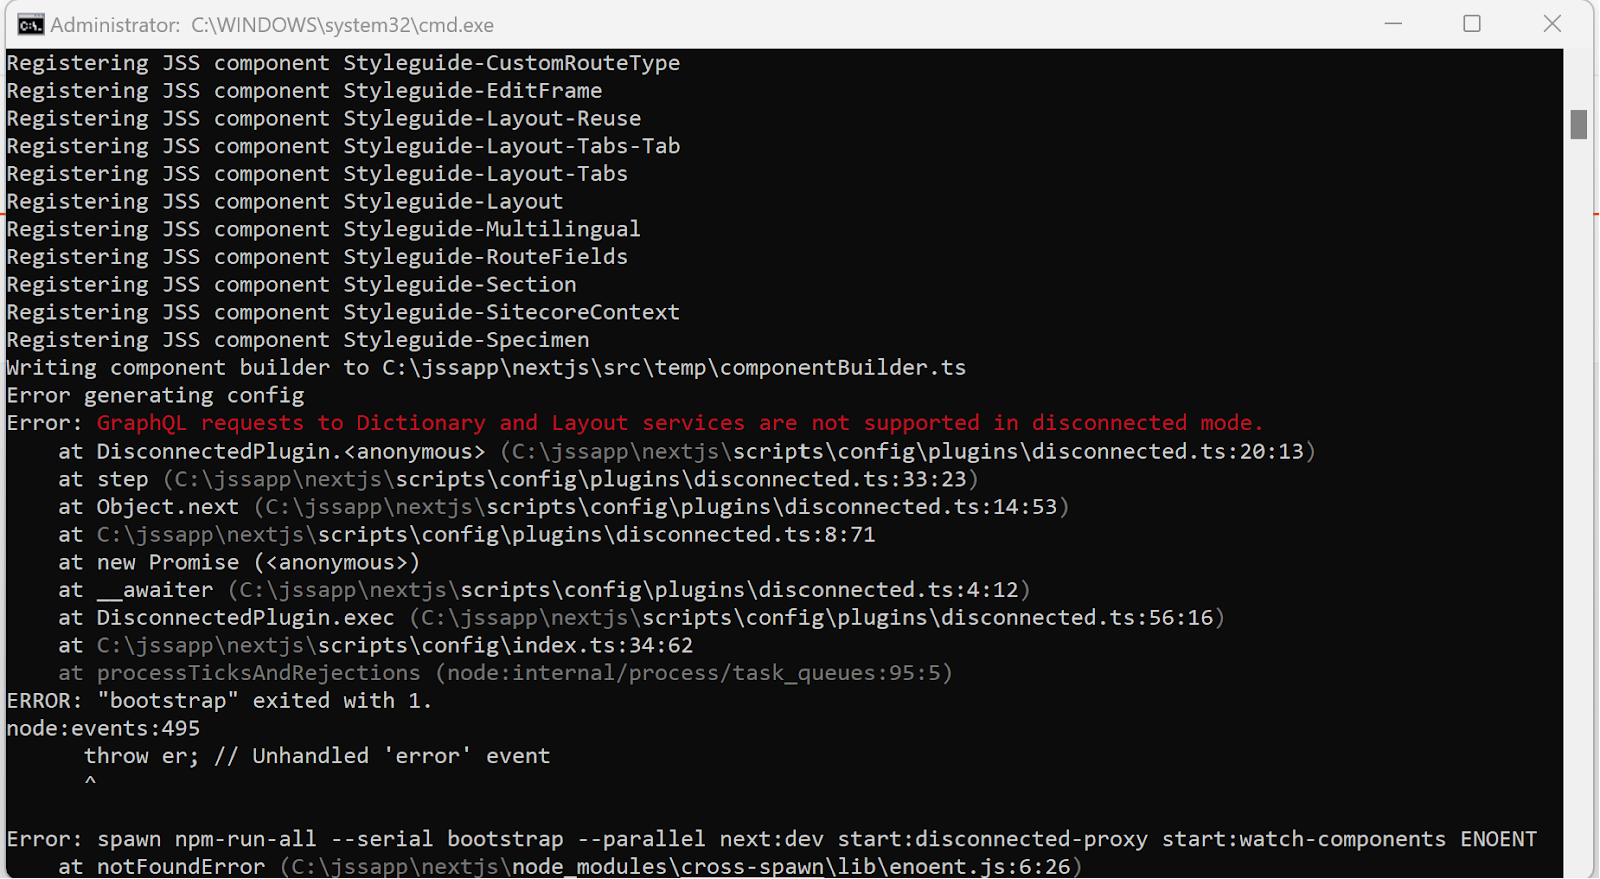
1.1.e jss start command in the created sub-folder fails since disconnected mode doesn't support GraphQL:
Error: GraphQL requests to Dictionary and Layout services are not supported in disconnected mode.
1.2 npx approach (using REST to fetch data):Start in a new folder, do the same things as above but select REST instead of GraphQL this time:
1.2.a Execute npx create-sitecore-jss
1.2.b Select nexjs option and press enter key for all other further prompts, until you reach the GraphQL vs REST selection
1.2.c Select REST in GraphQL vs REST prompt and again press enter key for all other further prompts while you ensure to select just the first option in case of add-on initializers prompt:
1.2.d Post automatic npm install, I've the necessary setup:
Note that based on above instruction, if you execute jss start in the same folder level, you will get the following message since the npm_modules folder is created under the sub-folder:
JSS CLI is running in global mode because it was not installed in the local node_modules folder.
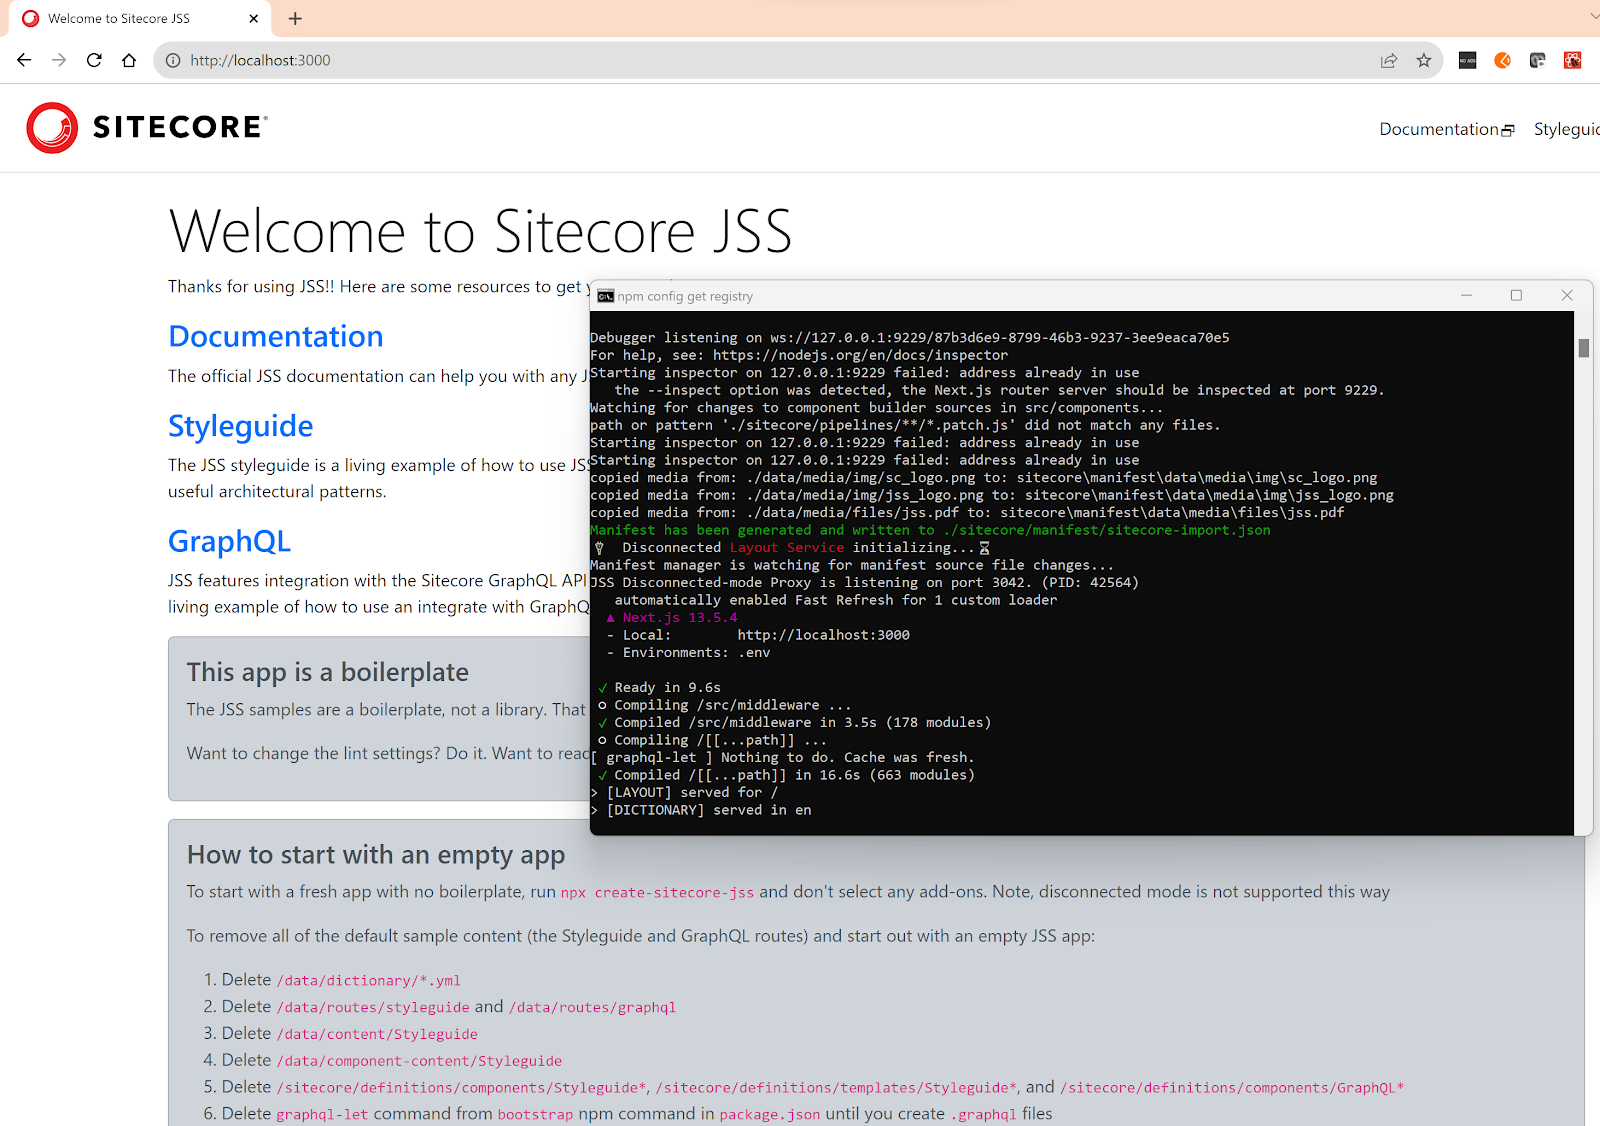
1.2.e So, traverse to the created folder and execute jss start to finally have the desired end-result this time:
************************************************************
Interesting Scenario: Blank page in disconnected mode
Start all over from beginning or in a totally new folder:
1.3.a In c:\jssapp, execute npx create-sitecore-jss nextjs --appName my-nextjs-app --fetchWith rest
Believe me, rest is not case-sensitive!
1.3.b I accepted most of the prompts as default including the app name, Sitecore host name but toggled all instead of space for add-on initializers
1.3.c Executing jss start command at the end, hosts the site in http://localhost:3000 but the page is displayed blank this time -
The reason is there is an issue in the selection of option since both nextjs-Sxa and nextjs-personalize options are incompatible with other options but the instruction is allowing to select all options including these two incompatible options (through "a" key toggle) but when you select the options individually, you get a proper warning as follows:
Warning: nextjs-styleguide-tracking add-on is not compatible with nextjs-personalize add-on. This may cause unexpected results.
Incompatible option list (for reference):
i) nextjs-styleguide-tracking cannot be used without nextjs-styleguide
ii) nextjs-Sxa and nextjs-styleguide are incompatible
iii) nextjs-styleguide-tracking and nextjs-personalize are incompatible
If you select the right combination, the page must display fine:
****************************************************************
Trivia:
While it might be familiar that in case of global package installation, npm install -g @sitecore-jss/sitecore-jss-cli@19.0.0 will install the concerned version of the package and npm install -g @sitecore-jss/sitecore-jss-cli (without version) will install the latest version globally,
If you execute npm uninstall -g sitecore-jss/sitecore-jss-cli the package will get uninstalled from the global npm folder, in my case, this location in file system - C:\Users\conta\AppData\Roaming\npm\node_modules
On the other hand, if you add the version number like this: npm uninstall -g sitecore-jss/sitecore-jss-cli>@19.0.0, the package doesn't get uninstalled. Note that the package with that version was installed globally before execution of the version specific uninstall command. You have to just execute npm uninstall -g @sitecore-jss/sitecore-jss-cli for uninstallation!


Comments
Post a Comment