How to auto-generate SIF PS Install/Uninstall Scripts for Sitecore 10 Website
Prerequisite: SQL Server 2017
Windows OS: Windows 10 Pro
Since in this article, I'm setting up the SCIA for the first time in a brand new machine, many of the steps can be skipped if the environment is already setup. Will add a separate blog article for the same for ease of understanding and use.


 18. Save and Close the settings form. Close the SIF window too and relaunch from the menu bar. Once the form launches, press the DB Connection Check button to proceed to the Site Info tab:


 25. Back in the SIF installer, fill the generated Solr Url and click the Solr Check button and that must auto-fill the other Solr values:


1. Go to SCIA Github. Download the latest installer by clicking the releases in the right side of the page-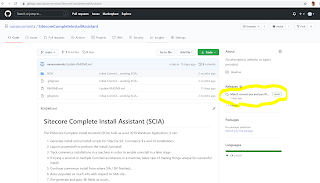


7. In a brand new machine, one of the first steps is to install the SIF module. In other words, if you can find C:\Program Files\WindowsPowerShell\Modules\SitecoreInstallFramework\2.3.0 folder, you can skip this installation. If not, press the "SIF Module Install" menu bar button that launches the installation:

2. In the release page, click to download the SCIA.exe:

3. Once the exe is downloaded, copy it to a folder in the filesystem say, c:\SCIA -

4. Right Click the exe and "Run as Administrator", the application opens up -

5. Provide connection details to the sql server and press connect -

6. The dialog should disappear if there are no connection issues and the main form will be visibly blank:

8. PowerShell script is launched and SIF is installed in the file system (press Y whenever PS prompts for permissions):

After this run, you will find the following new folders:
C:\Program Files\WindowsPowerShell\Modules\PowerShellGet\2.2.5
C:\Program Files\WindowsPowerShell\Modules\PackageManagement\1.4.7
C:\Program Files\WindowsPowerShell\Modules\SitecoreInstallFramework\2.3.0
9. Since this is a new machine, I'm going to install the latest .NET hosting bundler. In other words, if you already see the C:\Program Files\dotnet folder and C:\Program Files\dotnet\shared\Microsoft.NETCore.App\3.1.8 folder , you can skip this installation process. Otherwise, Click on the dot net menu button that launches the installation:

10. PowerShell will be launched and the installer will be downloaded and launched automatically. Agree to install .NET if prompted:

11. Once the install is successful, you must see the dot net folder in the file system:

12. The next step is to do a quick db setup in order to access the different Sitecore versions. Select the "Setup Versions and Prerequisites DB Table" menu bar button and click the Create button:

13. Once the DB Tables are setup successfully, close the form and open the Set Version form by clicking the "Set Version" menu bar button:

14. Since we are going to generate PS scripts for Sitecore 10, select 10.0 from the drop down and click Save. This will automatically enable the buttons configured in the backend for required installations.

15. Since we are going to generate SIF-based scripts for Sitecore 10, click on the Sitecore Installation Framework (SIF) menu bar button and that should launch the necessary form:

16. Click on the DB Connection Check button to enable access to other buttons:

17. Since this is the first time this form is accessed, save the settings as-is. Provide random values for Braintree info since its more relevant to Commerce Installation:


19. Provide a site prefix and press the next button in the menu bar -

20. All tabs except the Solr tab will be auto-filled -

21. If you don't have a Solr url, click the Solr installer main form menu bar button:

22. In the form, just enter the Solr prefix and all other values will be auto-filled. The form has the capability to install any Solr version but since Sitecore 10 needs Solr 8.4.0, we proceed with the install:

23. PowerShell is launched and Solr is installed:

24. Just in case if you need the script for Solr installation in a different machine, you can find the same in the file system:


26. Again, since this is the first time we are trying to install Sitecore 10 website using SIF, we need to setup the required Sitecore packages prerequisites. So, click on the prerequisites button on the form and it will list all the prerequisites -

27. Since the wdp and license files are not available in the same location as the exe file, the prerequisites are not checked. Copy over the license.xml to the file system in the same location as the SCIA.exe.
The downloading of Sitecore packages needs SDN Login so, let's login to SDN -

28. Once you are logged in to SDN, you should be able to download all the necessary prerequisites by clicking "Download and Setup All Prerequisites" link. -

Note that once the PowerShell script runs successfully, the package is downloaded and extracted in the file system:

29. The next step is to click the install prerequisites button to install all the prerequisites listed in prerequisites.json -

30. Once the Powershell script runs successfully, reopen the prerequisites form to doublecheck if all prerequisites are available:

31. Now, back in the SIF installer, use the next button to traverse from the site info tab and press the validate all button to check all validations pass successfully:

32. Click the Install button to launch PowerShell script for installation:

33. Once the PowerShell script runs successfully, the website will be created in IIS. Note that the install script for the website specifically is saved locally.

In order to uninstall a website, open the same SIF installer form,
1. Perform DB Connection Check
2. Provide Site Prefix, press next button
3. Validate All button gets enabled, click the same and, fix any validation issues
4. Click the Validate All button again to check if validations pass successfully
5. Uninstall button gets enabled if validations are successful


This comment has been removed by the author.
ReplyDelete