The beauty of Sitecore Docker Images Repo Build.ps1 - a gem in the making for Sitecore 10
One of the main uses of Docker is it's capability to pre-package services so that developers in a team don't need to spend time setting up the project environment. This is where the concept of a private Docker repository too comes into picture. Each project with its own repository containing images specific to that project always provides better head start for a new team member.
I presume the Sitecore Docker Images Repo needs no intro. If not, check this page by Rob Earlam.
This repo is fully functional for 9.2 / 9.3 and I presume functionality for Sitecore 10 is still under construction for various topologies. Based on what I see for 9.3, you can just pass topology that you need to build docker image for, along with parameters for additional features/layers. The Build PS script pulls the images necessary for your topology (from dev.sitecore.net) and you can run containers on your machine. You can also push the image to your private repo by just specifying credentials for your repo.
.\Build.ps1 -Topology "xm", "xp", "xc" -SitecoreUsername "navan@x.com" -SitecorePassword "mypwd" -IncludeSpe - IncludeSxa -IncludeJss -Registry "navadockerid/mydockerrepo"
There is a SetLicenseEnvironmentVariable.ps1 script used to store the license file content encoding in the machine's system environment variable. Currently, the script accepts 2 parameters -
1. Path (mandatory)
2. PersistForCurrentCustomer (not mandatory)
The PersistForCurrentCustomer param is a switch. Based on this param, there is a condition check in the bottom of the script and, the environment variable gets set if the license file path and the switch for saving the encoded value as an environment variable is passed. I think that boolean would be more intuitive for the flag since the prime purpose of the script is to set the environment variable but then, its just my opinion.
Anyway, the idea of this blog article is to highlight the beauty of Build.ps1.
In order to understand the beauty of the Build.ps1 command, I've specified what I needed to do to get my Sitecore Commerce 10 image built and pushed to my private repo. At a high-level:
- Run the existing Sitecore Commerce instance in Docker
- From the containers, build necessary images
- Make changes in Docker compose file to reflect the new repo / image
- Run the Sitecore instance from the new Docker compose file with new repo urls
- Push the images to your Docker repo
- Pull the images from the new repo and use it in another machine now
The step-by-step approach (without Build.ps1):
Without the build.ps1, I will have to do the following steps to build and push each of my images to a private repo. Note that you will need the Docker user id and repo anyway if you need to push to your private repo. Also, you have to use docker compose up and down commands even with build.ps1 in place but its much cleaner. You are ridden of the manual and repetitive job of pushing each and every image manually. Most importantly, the build.ps1 has the capability to pull base images from dev.sitecore.net.
Just highlighting here the manual steps involved while working with Docker and without build.ps1 in place:
1. Sign up to get a docker id -
2. Create a repository in Docker Hub. The repository is where your images will be pushed.
3. Download Docker for Desktop , install and login using the id and password created from above step. -
4. Create a repository in Docker Hub.
5. Execute docker-compose up -d (where the docker compose file is located - C:\sitecore\Sitecore.Commerce.Container.SDK.1.0.214\xc0 , in my case) to first get the Sitecore 10 Commerce containers running.
6. The list of images points to scr.sitecore.com repo and they must instead point to the new repo created in the earlier step. So, let's get it working. Let's take SQL Server container as the first one to convert -
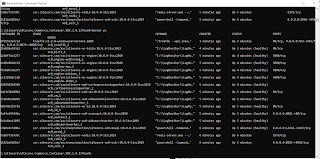
Note that the container is based on scr.sitecore.com image.
7. The container id is 04e8e0e73f74 - I need to stop the container before i create my own image of it
docker stop 04e8e0e73f74
8. Since the command returned with the container id, the stop is successful. If you run a docker ps now, the concerned container will not be in the list.
9. The next step is to execute docker commit 04e8e0e73f74 and this will create our own image from the above container:
docker commit 04e8e0e73f74


Comments
Post a Comment