Note: At the time of this writing, the Sitecore demo portal is available only to Sitecore MVPs and partners! This blog is based on the demo portal!
This is Part 1 in the series:
While the Sitecore Demo Portal allows deployment of pre-built demo sites, as a curious Sitecore developer and as a fan of thriller movie genre, I wanted to see what-if I configured a totally new fork/repository. I didn't want to experiment too much and decided to point to my fork of the actual Play Summit demo repository. The primary intention of this blog article series is; take baby steps towards understanding Vercel / GitHub integration apart from some test-drive of the Demo portal. So, if you have the time, just read-on.
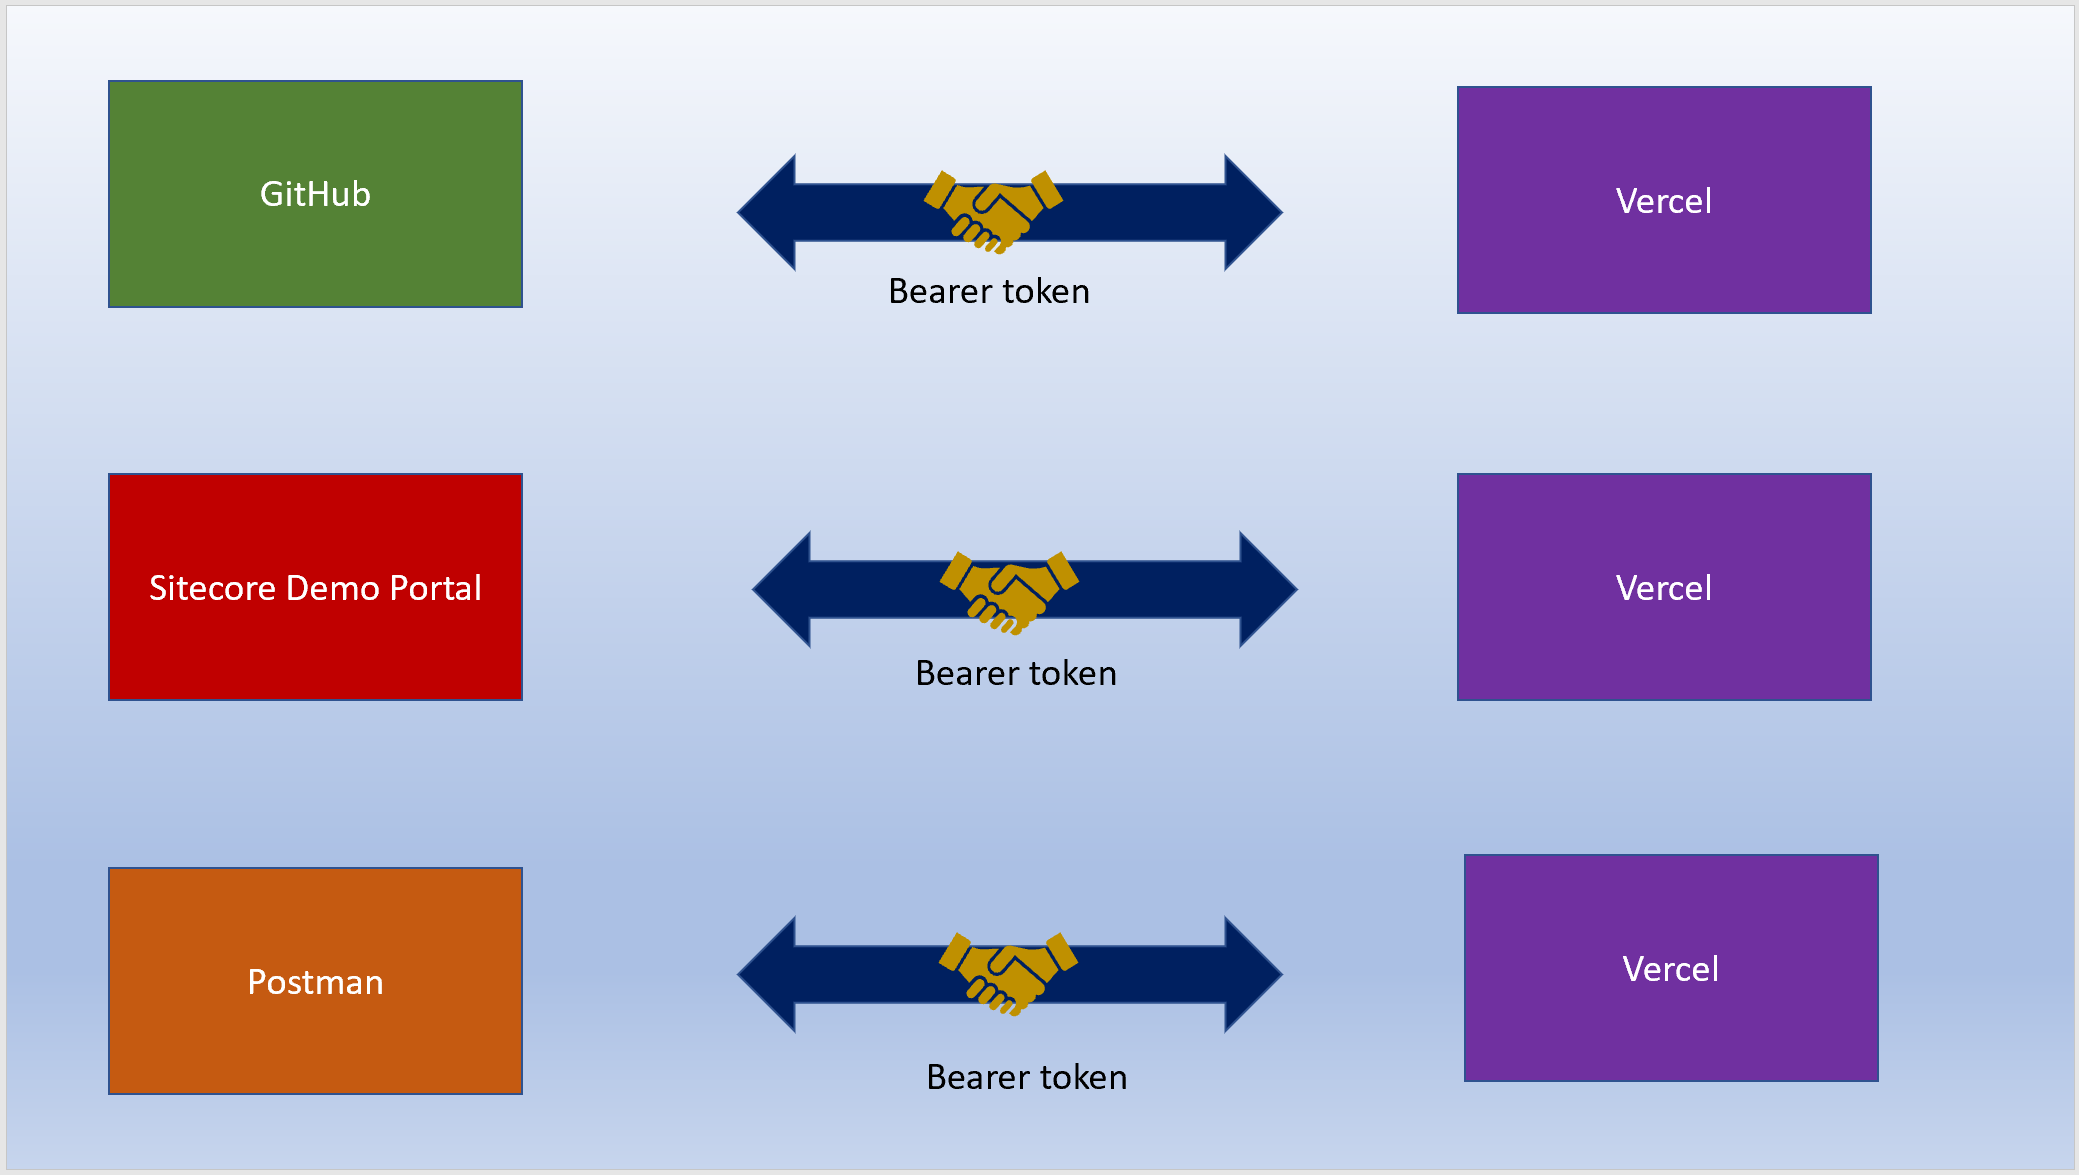
Since this blog article primarily deals with Vercel bearer token, here is a diagram to depict why bearer tokens are needed - for external applications to communicate securely with Vercel:
Now, off to the actual blog article:
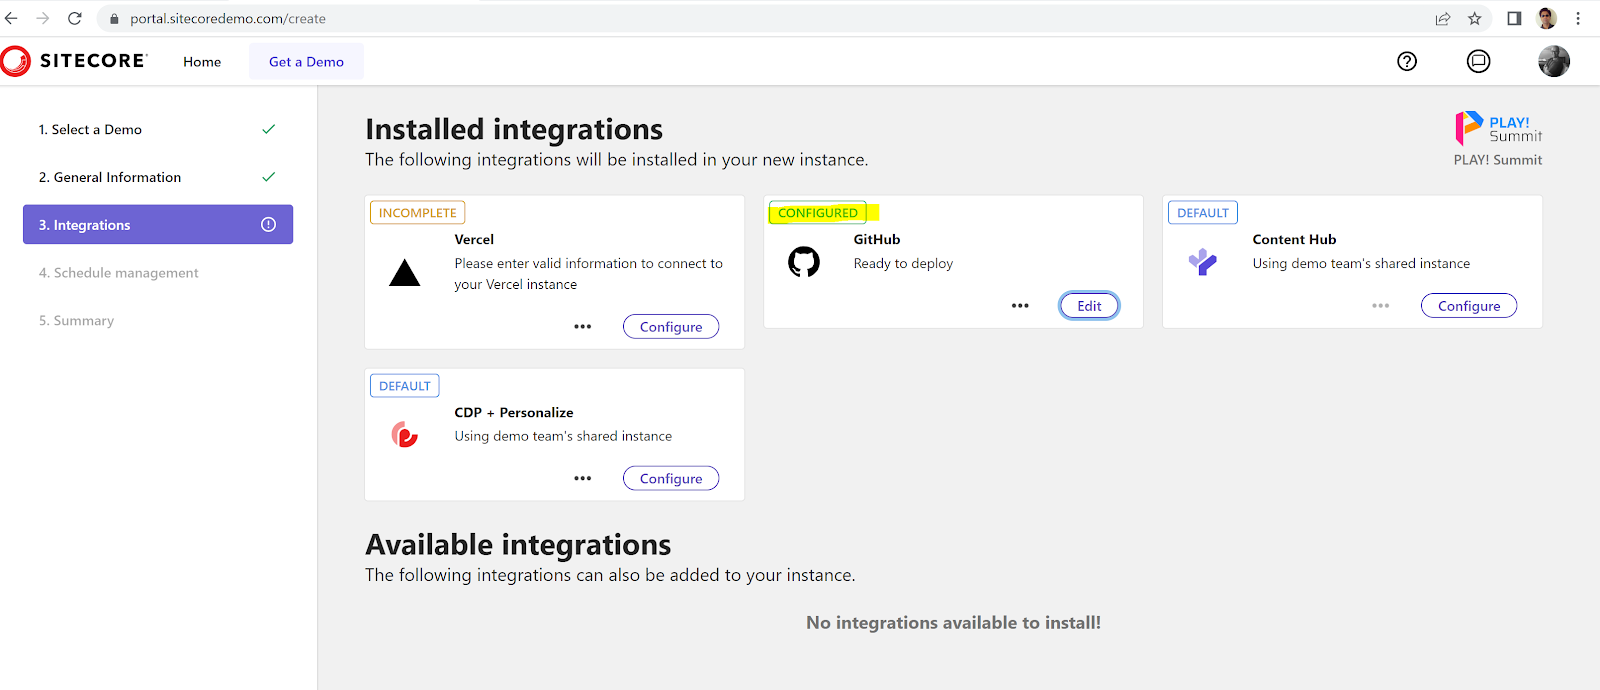
Since this is a customised deployment in Sitecore Demo Portal,
Configure my GitHub fork/branch:
Once I apply the above change, can see the configured branch in the portal:
Vercel Configuration is mandatory and hence, a Vercel token:
So, let's create a Vercel token:
How to create/configure a Vercel token?Go to Vercel Account tokens
Presented with Vercel login page and I continue with GitHub:
Authorize Vercel:
Account not found:
So, I choose the sign up option in the bottom of the above page to register:
Continue with GitHub and provide phone number for authentication:
I get a auth token as SMS, input that in the Vercel page and can also see some proof that
Vercel recognises my GitHub account:
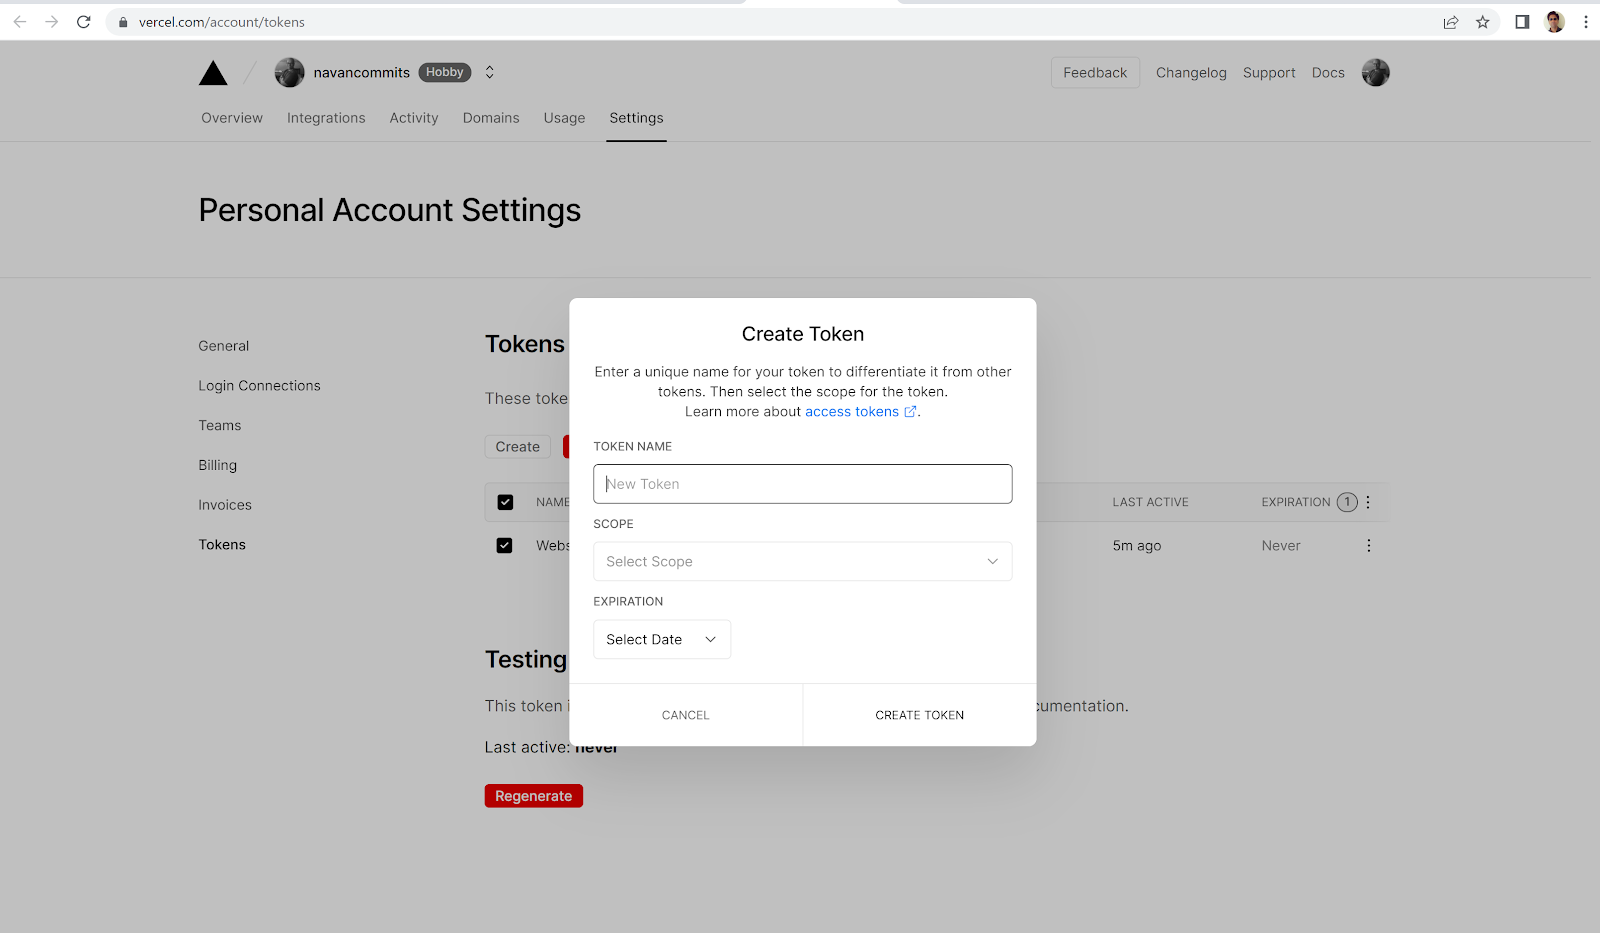
Next, create new token from
Vercel tokens page and a Create Token window appears:
Provide inputs in the above page and click create, token created finally:
This is our important bearer token. Store the (bearer) token safely.
The table below has the latest token name, expiry etc. but, you have to create a new token if you hadn't copied and stored the generated token from last step:
Use Curl to check the Vercel bearer token:
Prerequisite: You must have curl.exe under c:\windows\system32 and obviously the path must be part of env variables!
One way to test that the token is good enough is to use this curl command:
curl "https://api.vercel.com/v6/deployments" -H "Authorization: Bearer <above token>"
Note that curl must be recognisable in the cmd prompt:
Also, if you don't pass the actual token after Bearer as per the syntax provided in the curl command above, you will get an error like this:
{"error":{"code":"forbidden","message":"The request is missing an authentication token","missingToken":true}}
The above error is because I didn't pass Bearer string before the actual token and sent it as follows:
curl "https://api.vercel.com/v6/deployments" -H "Authorization: XMkMy9zTlOAKYvrNVOTHb489"
On the other hand, when I sent the curl command as follows, I didn't receiver any error:
curl "https://api.vercel.com/v6/deployments" -H "Authorization: Bearer XMkMy9zTlOAKYvrNVOTHb489"
This was the message that came back since I didn't have any deployments in the Vercel side:
{"deployments":[],"pagination":{"count":0,"next":null,"prev":null}}
Just for testing, if I change a character in the bearer token, I get this error from the curl command:
{"error":{"code":"forbidden","message":"Not authorized"}}
Back in the Demo portal, input the above (bearer) token and validate:
Note: Don't input the Bearer string, just the bearer token generated in Vercel! You can see that the Vercel token is identified!
Just a proof that if you input a random string, validation fails:
A screen shot of my testing with Postman just for reference:
POST https://api.vercel.com/v8/projects
{
"name": "123"
}
Note: the Authorization key bearer token passed as part of the header!


Comments
Post a Comment