Sitecore XM Cloud Basic Features - Developer's viewpoint
Note: At the time of this writing, the Sitecore XM Cloud is in limited access and the demo portal (covered here) runs on AKS and is not the same as the actual Sitecore XM Cloud! This demo portal too is available only to Sitecore MVPs and partners! This blog is based on the demo portal but, there "might not" be much difference from the actual Sitecore XM Cloud when it comes to features!
Actual blog:
It is always good to know and flaunt the features of a new offering. Based on my first-hand developer experience of Sitecore demo portal, here are a few features of Sitecore XM Cloud I visualise. Like any SaaS platform, the features are not much different but then, don't want to miss an opportunity to put together a diagram!
Ready-reckoner Sitecore XM Cloud features diagram:

- No Sitecore installation/setup headache: select services to install and, XM Cloud handles
- Easier Sitecore Version Upgrades
- Sitecore license handled by XM Cloud: end littering of Sitecore license file across computers
- Capability to deploy sites
- A portal to view deployment status
- A minimal Deployment log for each step
- Schedule shutdown time for the instance
- Delete instance option
- Integration with GitHub, Vercel, OrderCloud, ContentHub, CDP
- Unique Urls for your deployed instances:
- Content Editor
- Horizon
- Website
- Auto-generated Content Management User Password for each user (no more b password!)
- Manage and invite users within your org for Content Management
- Automated personalised email on instance deployment
Personally, as a developer, I'm excited about the GitHub integration. I also see a scope to integrate with other repositories like bitbucket and can't wait to get my hands-on such things!
For future, an automated email or a notification on instance deletion will be useful since that seemed a blink and miss as I couldn't see a deleted status anywhere in the portal either!
1. Access Sitecore Demo portal
2. Presented with login page:

3. Once login credentials are provided, you are in the portal:

4. Clicking on Quick Deploy, launches a set of pre-built projects ready to deploy:

5. I choose Play Summit and I input instance details:
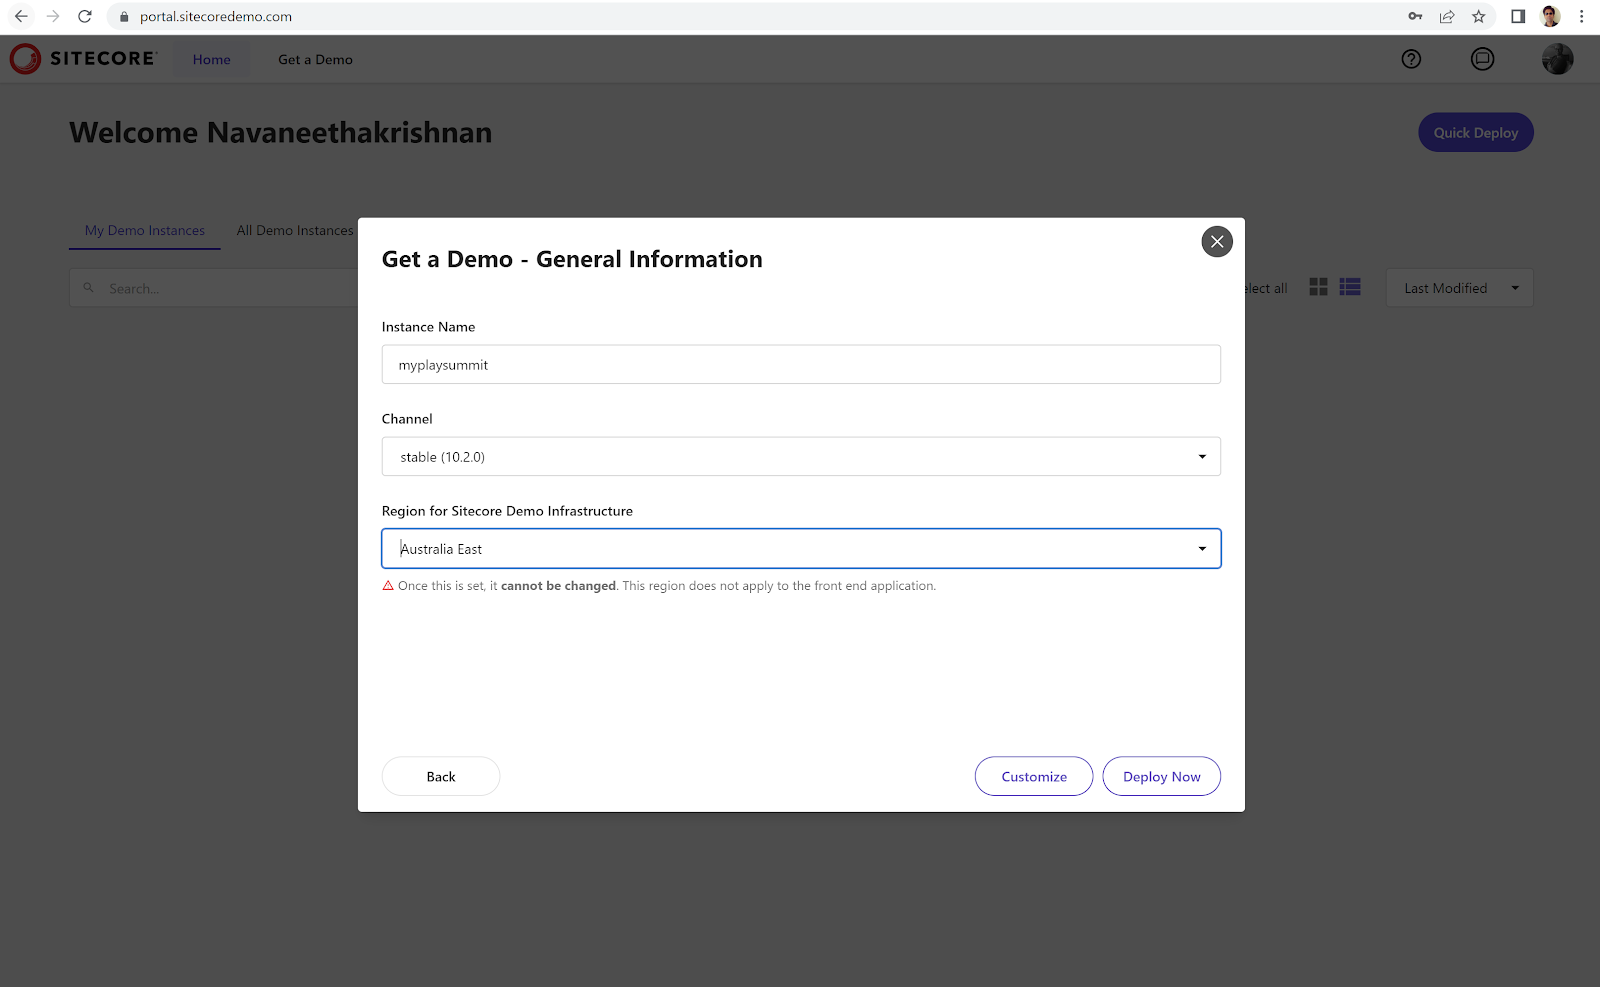
6. Although I have an option to customise the install, I decide to deploy as-is by clicking the Deploy Now button and this is what I'm presented with - this nice deployment status page:
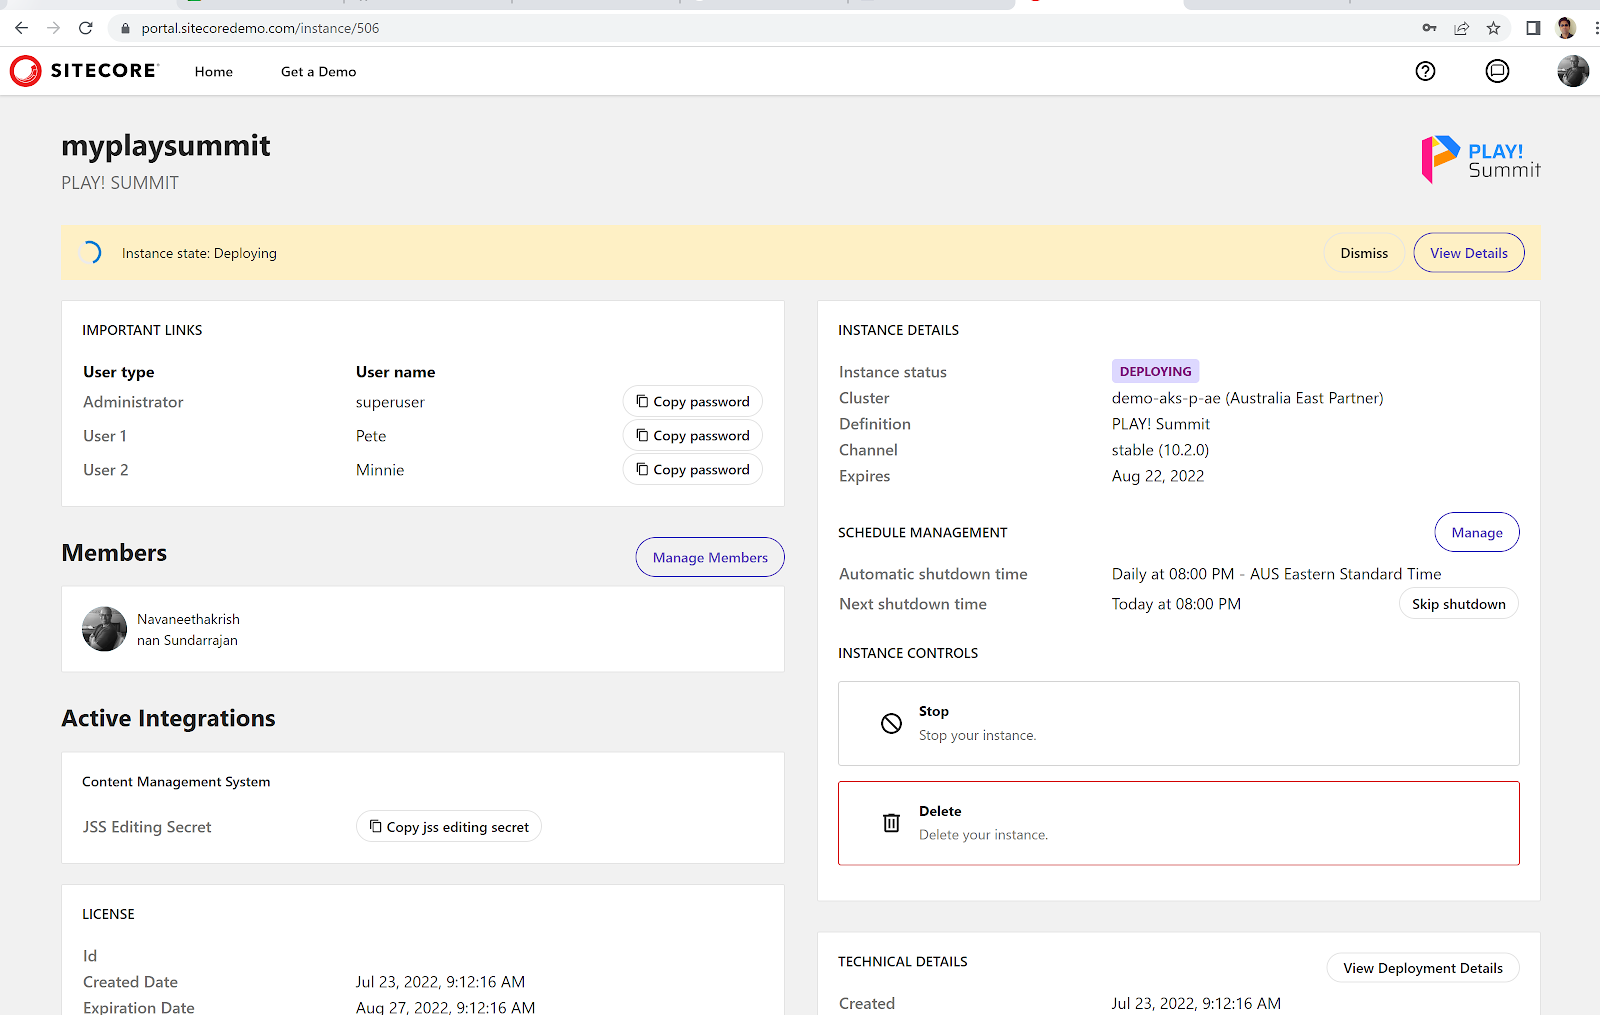
7. Note the automatic shutdown automatically configured above and it is configurable too!

7. View Details button click shows the detailed deployment status:

8. Back in the main page, you can see the new services displayed as and when they get deployed:

9. You can also invite new members to the demo site but members must be in the same organisation domain as you:


11. My instance status is ready in the portal:

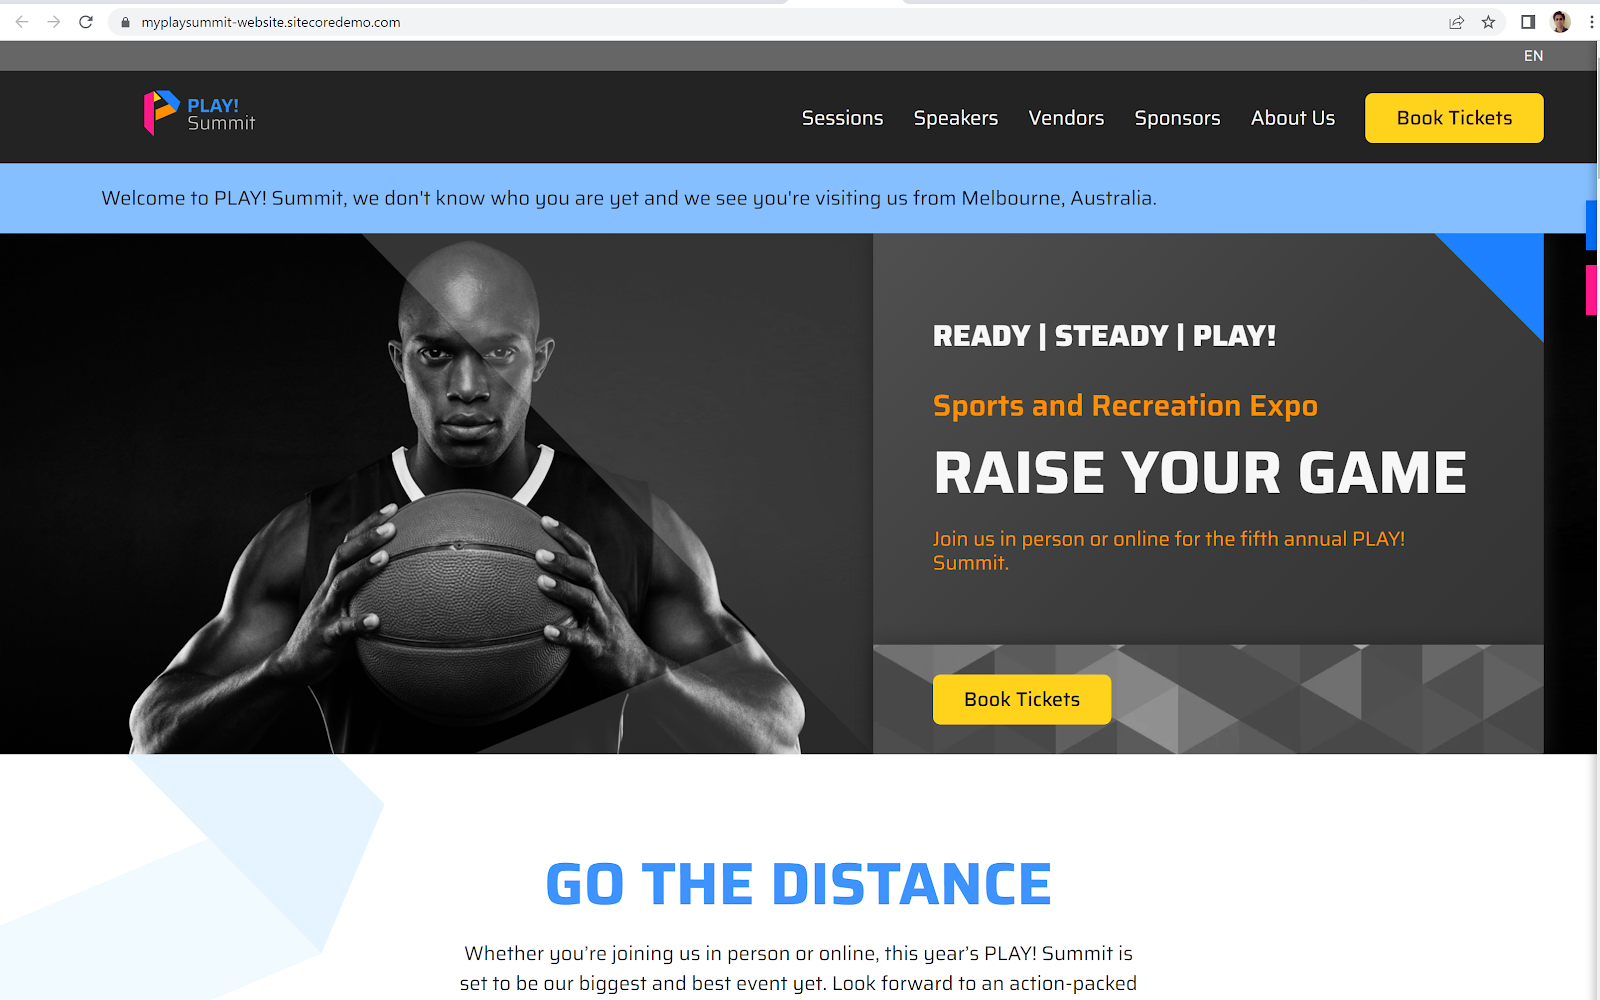
12. I love the fact how on clicking each service url, it opens the concerned site, no more poring through .env file to find the instance urls:
Website:
Kiosk:

TV:


Content Management:

Most importantly, password is no more b since it is randomly generated and sent!
I could login too! Hip Hip Hurray!


13. Now, any unwrapping is incomplete without performing a basic change so, I perform my most favourite activity of changing the logo:

14. Published item:

15. And, could see the change on the site after I allow a few seconds of time lag:

16. Delete instance:

17. Deleting status:
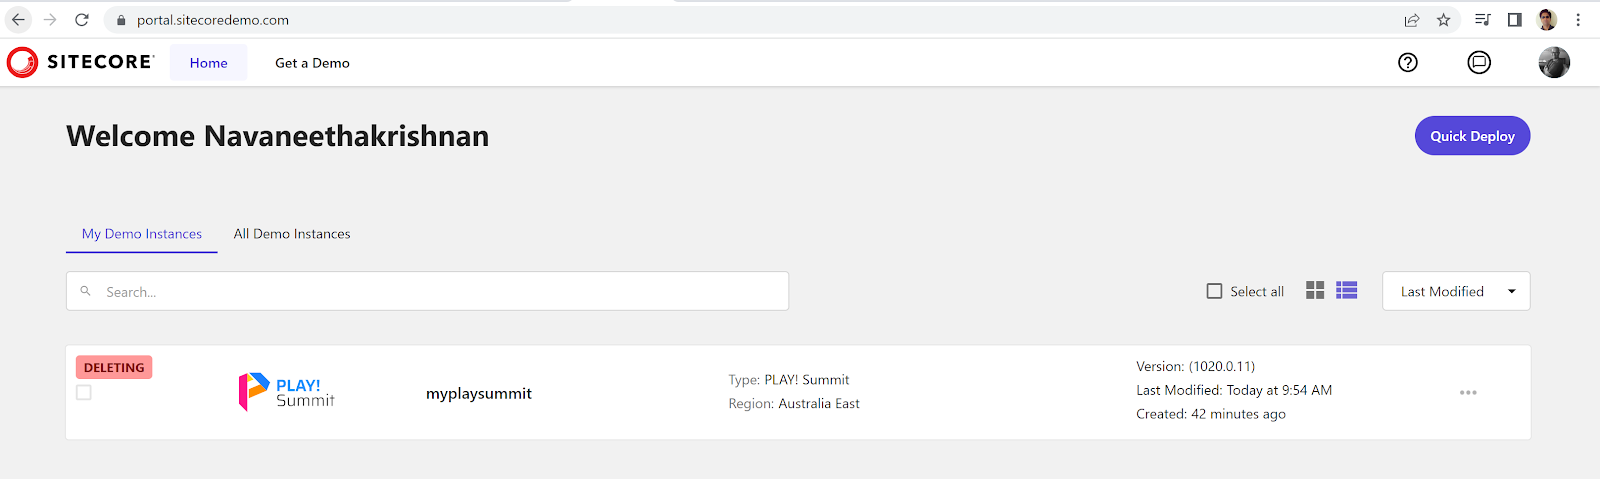
18. After sometime, refreshing the above page didn't display anything, it was an inference that the instance is deleted then accessing the website and other urls proved the same:


Comments
Post a Comment